

![]()
A usual side effects when using entry-level lenses is the presence of vignetting in the pictures.
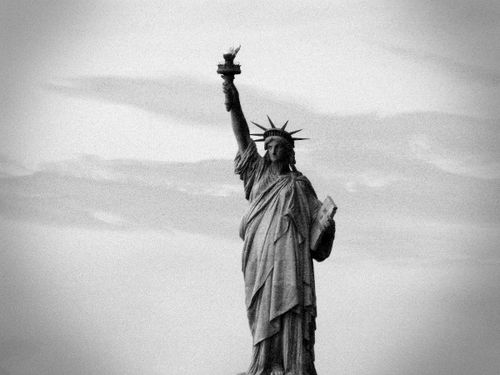
Vignetting refers to the darkening that happens due to the loss of illumination causes by the lens itself, which is more visible when far from the image center. Typically, corners of the picture appear to be darker than the central area or subject.
Even when this can be considered to be a defect or drawback, it is also sought after, as an added effect to black and white conversion or sepia toning, in order to give a retro look to the pictures.
How to do it
In GIMP, open your picture. As commented, first you might want to convert it to black and white or even tint it to sepia, blue...
Then, you have to create a new layer (either from the Layers menu or with the right button over the original layer miniature in the accessory window). Remember to have this new layer active for edition.
With the circular selection tool, draw a very big circle - some areas will remain out of the image. You may draw it from its center, by keeping the "Control" key pressed while drawing.
Invert the selection (Selection -> Invert) and fill it in with black paint (Edition -> fill in with foreground colour). De-select everything with the square selection tool.
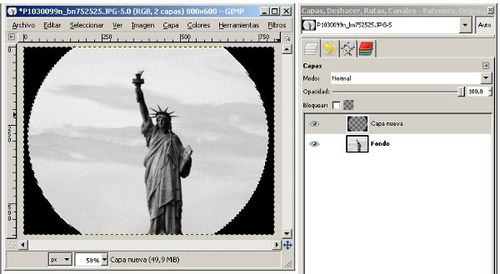
Still with the upper layer selected, apply a blurring filter (Filters - Blur - Gaussian Blur...) with a big radius - maybe a 25% to 50% of the shorter image side (if your picture is 800 x 600, take arond 300 radius).

Fusion...
To soften the effect, you may play with fusion modes in the layers window (typically, choose "Normal" or "Darken only") and with transparency (to reduce the effect).
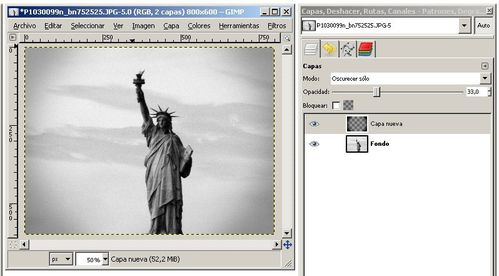
Remember that you have to flatten the image (at the layers window, right click) or export it, if you want to save it as JPG file...
you might also like...